Start Now – Step 2: Domain Name and Building Your Site
As with everything new, when starting a website for your business, there is a tendency to just jump in and get everything done in the shortest possible time. For some, this may be what they need but to create a lasting impression and a purposeful site that will bring you new clients for your business, you are going to need to plan things out and do it properly.
Choosing a Domain Name
Do you research, find the relevant keywords for your industry or business. Use the host’s domain name checker to see if your target name is still available. GoDaddy offers domain names at low prices. Use Google’s Keyword Planner to research keywords and find keyword ideas and its average monthly searches.

A good domain name needs to stand out, memorable, easy to type, unique and as short as possible. However, if a short and unique name is not available, a longish name made up of several words (2-4) that forms a meaningful phrase or that explains your business would be just as good. You are allowed up to 67 characters in your domain name.
Avoid using hyphens, numbers, short forms, shorten words, difficult to spell words, deliberately misspelled words (you might think its clever) as these will confuse the potential customers and hard to convey over the phone or in a face to face conversation.
Also, consider building a brand that will set your business apart form the rest. If you already have a unique name in mind, don’t be afraid to use this. With time, and plenty of fresh content on your website with a healthy dose of keywords related to your industry and SEO, your website will attract organic traffic (from search engine results). A strong branding and marketing exercise including online advertising will also help drive traffic.
We often get asked if one should consider getting .com .net .org domain or county specific top level domains (TLDs) or both. If your website or business caters only to a local community such as gardening services, job agency or takeaways then a country specific domain name make sense.
But if your business needs to reach an international audience then going for a .com .net or .org domain is preferred. Using an obscure or country specific domain may be detrimental to the site as it needs to reach out to audience outside of the country.
If both .com and country specific domains such as co.uk are available, it may be worth getting both domain names and forwarding one to the other to capture all possible traffic e.g. mycompany.com and mycompany.co.uk both. But if you wish to keep the cost down, we would recommend going for the .com domain.
Other factors to consider are possible copyright infringement, clashing of existing business name or with existing product line, community name or brand name that are popular in other parts of the world and name association. Once decided, a quick search on Google should give you some clues as to the whether the name is in use anywhere.
Do’s and Don’ts When Choosing a Domain Name
Do’s
- Make sure you do your keyword research and keyword ideas using Google Keyword Planner (Watch the video in the next section)
- Check if your desired domain name is still available and start listing all possibilities
- Make it stand out
- Easy to remember, and easy to convey over the phone
- Easy to type
- Unique and Short (if possible)
- Can be a combination of 2 to 4/5 words
- If 2 or more words, use meaningful phrases
- Consider building a brand name
- Use .com .net .org domains to reach out to international and local market
- Use country specific Top Level Domains (.co.uk, .fr, .de) to focus on local communities
- If in doubt, get both .com and TLDs and forward one to the other
Don’ts
- Avoid hyphens
- Avoid numbers
- Avoid shorten word(s)
- Avoid words that are difficult to spell
- Avoid deliberately misspelt words (e.g. wordz, mybiznes)
- Avoid obscure Top Level Domains unless you business is local in nature
- Avoid copyright or trademark infringement, once decided search online to see if there are existing product line, community or brand in other parts of the world with the same name.
- Avoid name clashing with other existing products or services already out there
Once you have decided on a few domain names check with the domain registrar or hosting company to see if it is still available. It may not be the company you are going with as you will also need to decide which company you want to host your website, typically one with the best deal and they almost always offer both Domain Registration and Hosting service. It would be easier to buy both from the same company.
Some domain and hosting company offers a bundled package where a single domain is included in the price of hosting. Use one of the following links below to purchase your domain name(s) and hosting package.
You can buy more than one domain name if you wish but decide on one that you will use for the site. Other domain names can be forwarded to this one.
[box style=”warning red” ]NOTE: You will need a hosting package that supports PHP and MySQL. These are sometimes called Linux Hosting. Others may label this differently; New Hosting (1and1) WordPress Site/Blog Hosting (GoDaddy) and Shared Hosting (bluehost). Choose the plan that suits you. We recommend that you pick the highest plan that your budget allows. [/box]
Building Your Site
Here is where it gets interesting. Once you have decided on your domain name and registered for this, you can start to build the ‘foundation’ for your site. Note that some domain registrar takes up to 24 hours to activate your domain. Please check that your domain is active before you continue.
In Step 1: Get a Host, we talked about installing WordPress as the software that will power your website. While some might know it to be a blogging software, WordPress is used to build complete websites, membership sites, discussion forums, social networks, e-commerce sites, course delivery sites, you name it.
Based on PHP script and MySQL database, WordPress is one of the most successful and popular applications in the world which is why we recommend it. The ability to install plug-ins; add-on modules that give it more features makes it a very powerful platform to be on. So how do you go about installing the application?
Here is a quick video tutorial on the use of 1&1 Click & Build to install WordPress. 1&1 is our preferred provider as we use them to host our servers and websites. We also use GoDaddy for SSL certificates, Domain names and Hosting, both have provided us with reliable service and great support. Your hosting company may provide similar support for installing WordPress, please check with your provider.
How to Build Your WordPress Site on 1&1
Watch the video to see how you can make use of 1&1’s new App Center and Click & Build to install WordPress easily.
1&1 offers two modes to install and run your application, Safe-Mode and Free Mode. For the tutorial we used Free Mode as it allows us more control over the installation and choice of plugins to install later. If you have selected the Safe-Mode, you will only have access to a set of default plugins. This is not recommended as it meant you cannot extend the functionality of our site.
However, Safe-Mode does present an easy and maintenance free way to start your site, as 1&1 will take care of all updates and security patches for you. You will have the option to switch to Free mode later if you wish. That does not mean that if you use the Free Mode, you will run into trouble. 1&1 will keep you posted on any updates and security patches that you need to pay attention to and take action.
Logging on to WordPress for the First Time
Here is a follow up to the installation video where we look at logging on to the WordPress dashboard for the first time.
Be sure to check out the list of plugins preinstalled by 1&1 as part of the Click & Build. It gives you a good starting point in choosing which plugin to activate and use. The video also shows you how to add new plugins that you might need in future.
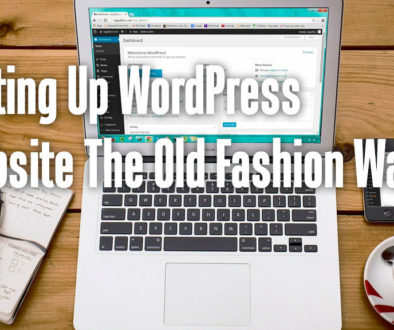
If you prefer to do it the old fashion way; manually creating MySQL database, creating a directory for your web files, upload and unzip WordPress code there and configure your domain to use this folder as your home directory, see Setting Up WordPress Site The Old Fashion Way.
Image Credit: querkmachine and INPIVIC

